Setting up your range of photo books
inbox.photo includes Koffeeware's acclaimed online photobook software, Creator Five. In a few click, with no investment, you can offer to your customers the very best online ordering experience for photobooks. You will be able to make it work with your existing equipment and supplies: minilab, digital printers, assembling and cutting machines, pre-built book covers. This page will guide you through the process of configuring your first photo book.
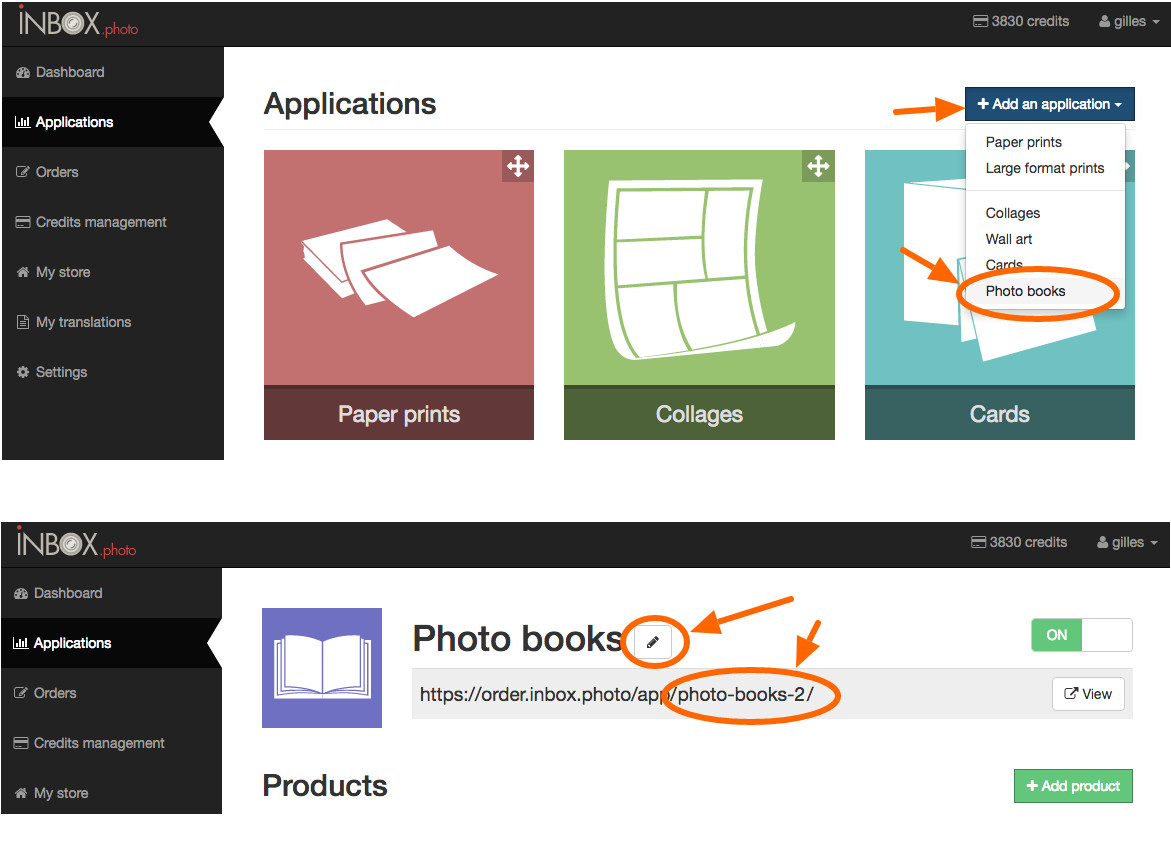
Photo Book Application
Your need to create your first Photo Book Application instance in order to create your photo book products. Applications in inbox.photo each refer to a particular type of product. You may create multiple instances of the same type, for the purpose of creating multiple categories like "Hard Cover Books" and "Wired Books". Once the application is created, you can edit its title (click the pencil icon) and "slug" (part of the URL, click the slug directly).
After your new application is created, you can easily rearrange all your existing applications by drag & drop. The order in your Dashboard defines the order they will be displayed in to your customers.
Configure your Photo Book
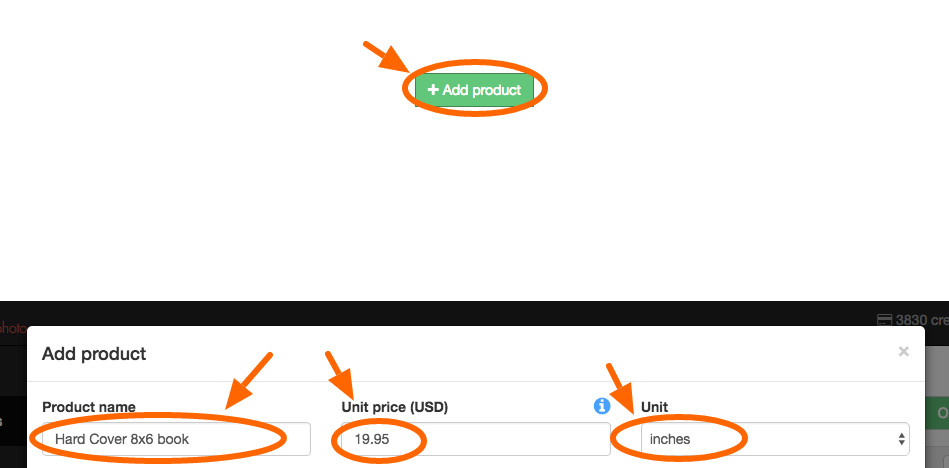
The Application you have just instanced comes with 2 example products which you may use as starting point or just delete if they are not needed. Create a new product by clicking "Add new product".
You can now set the product name, price and set the units system used for the configuration. Here we will use inches. The price you enter is the base price of the photo book with the minimum number of pages.
Configure Pages
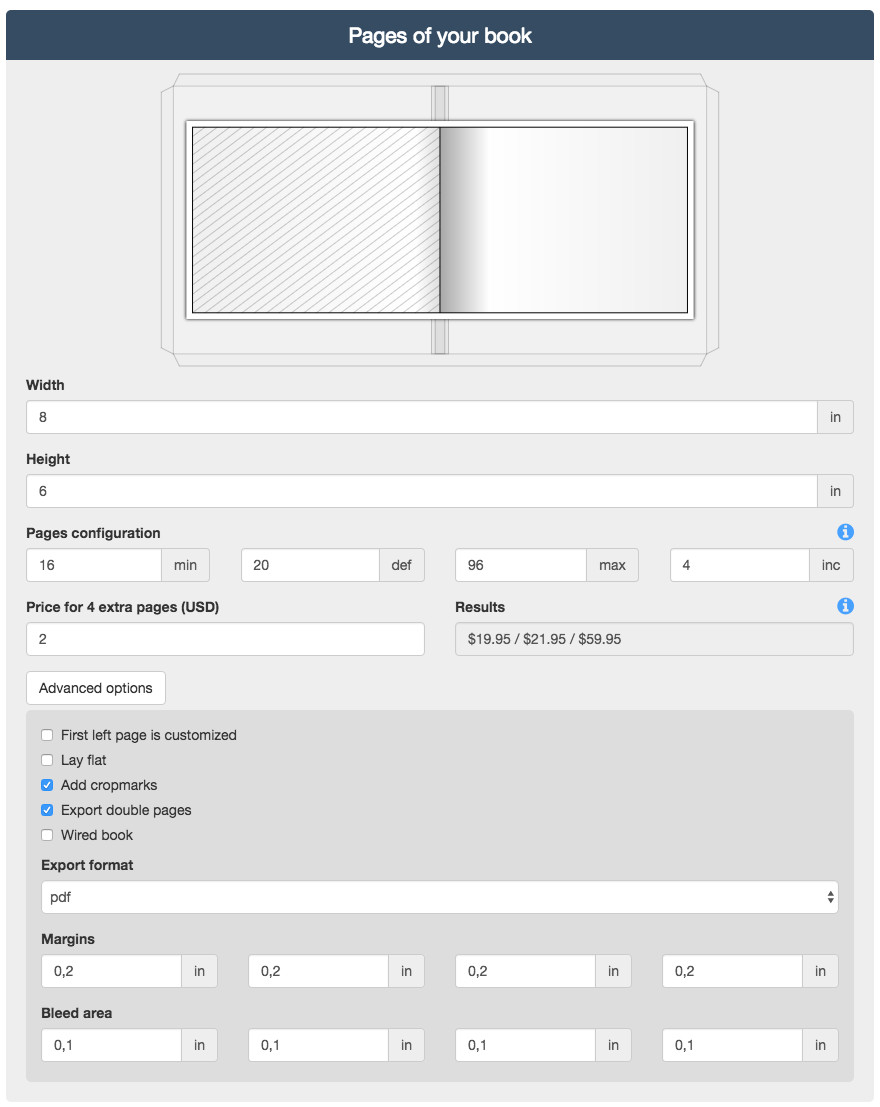
In this example, for simplicity, we will be assuming that you can print on paper sheets 8.4 x 6.4 inches in size. After printing you cut 0.2 inches all sides and thus you end up with pages of exactly 8x6 inches.
Set up block pages width to 8 inches and height to 6 inches. The values you enter here should always be the size of the final product, which the customer receives. They are also the values used for onscreen visualisation of the product when ordering (customer sees the product as they will receive it).
Set the minimum, maximum and default number of pages for your book, as well as the block increment. Set the price for the extra pages. You will see how the price is calculated from your settings, for the minimum, default and maximum number of pages.
Click on "Advanced" to open the advanced settings:
- First left page is customized : check this setting if the inner cover pages should be customizable in the application.
- Lay flat : this option has only a visual impact in the application. Check the option to remove shadows in the application, when you can do lay flat printing.
- Add cropmarks : check if you want cropmarks to be added in the exported PDF / JPEG files. Note that in order to view cropmarks, you will have to set margins to be larger than the bleed area.
- Export double pages : check if you want book contents to be exported as two pages in one sheet of paper.
- Wire book : this option has only a visual impact, check if you want wired binding to be displayed in the application.
You can then choose your preferred export format, PDF or JPEG.
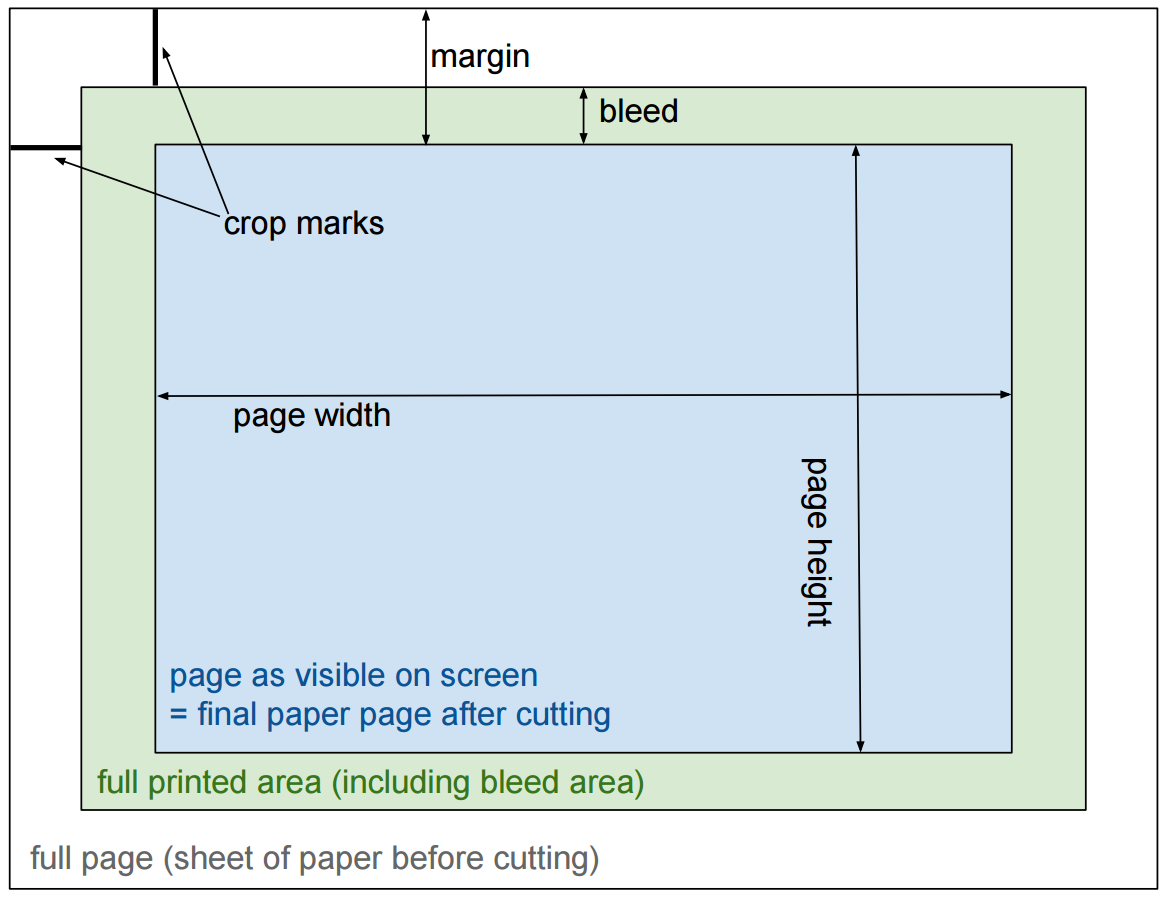
Bleed area and margins
The advanced settings let you configure a bleed area and a margin. Remember, the width and height of the page you entered above refers to the width and height of the final product, as received by the customer, and maybe not to the size of the sheet of paper you want to print.
The total size of the sheet of paper you are printing is (left_margin + width + right_margin) x (top_margin + height + bottom_margin). The bleed area defines how far customer's content (photos, background image) must spread out of the page. Two cases:
1) you want to have crop marks printed on your sheet of paper: define a margin slightly bigger than the bleed area. This extra space will allow drawing of the crop marks without going over the customer content.
2) you don't need crop marks: typically, you will set the margin to the same values as the bleed area. This way, customer's content will spread over the full printed sheet.
Configure Cover
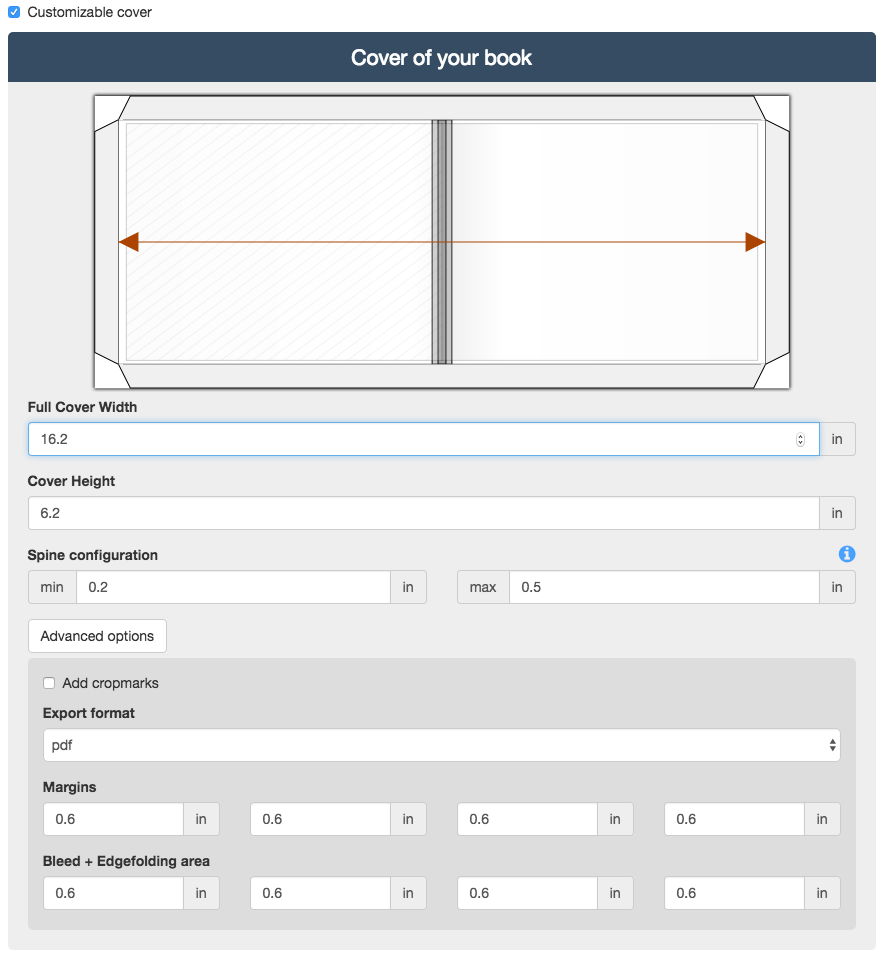
Cover with and height, bleed and margin are defined just like for pages. Keep in mind that the cover width asked is the full, unfolded cover width, thus for our example above, it would be at least 16 inches. Typically, for hard cover books, the cover is slightly bigger than the block pages, thus for our example we used 16.2 x 8.2 inches. The cover width specified does not include the size of the spine. The spine size is specified separately and allows to define two values, one for the minimum pages setting, one for the maximum pages setting (the other settings will be interpolated). The bleed and margin area you will define must include an area for edge folding (hard cover books). Here we set them to 0.6 inches.
The schematic preview lets you see the cover width and height, spine size, bleed / edge folding area. You also see how the block pages will fit within your cover, allowing to quickly check for obvious errors.
In case your photo book does not require a customized cover, just uncheck "Customizable cover".
Making Test orders
Of course we recommend that you create and process a few test orders of your book to check that all the settings are correct. Your inbox.photo account comes with free credits for that purpose. In case you need more credits for your test orders, before going into production, we fully understand, get in touch with us and we will help.
Now it is your turn:
> Go to my Dashboard and create my Photobooks
> Create my free inbox.photo account